Create a Course
A step-by-step guide for how to create a Course.
Last updated 3 months ago
Create a Course
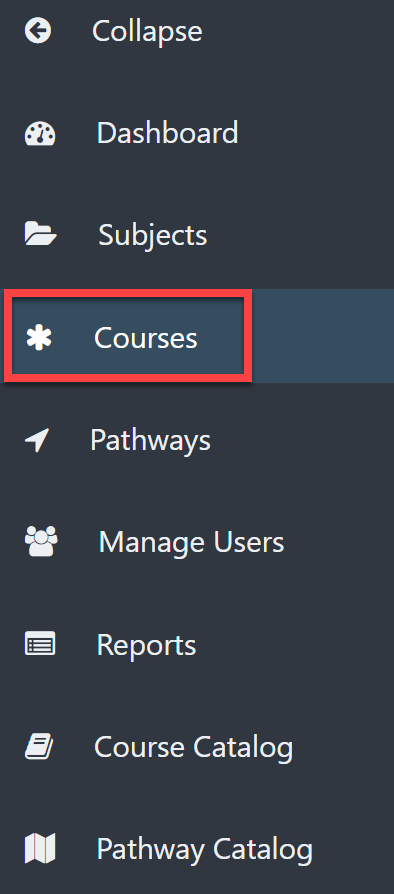
From the Dashboard, select Courses on the left menu bar.
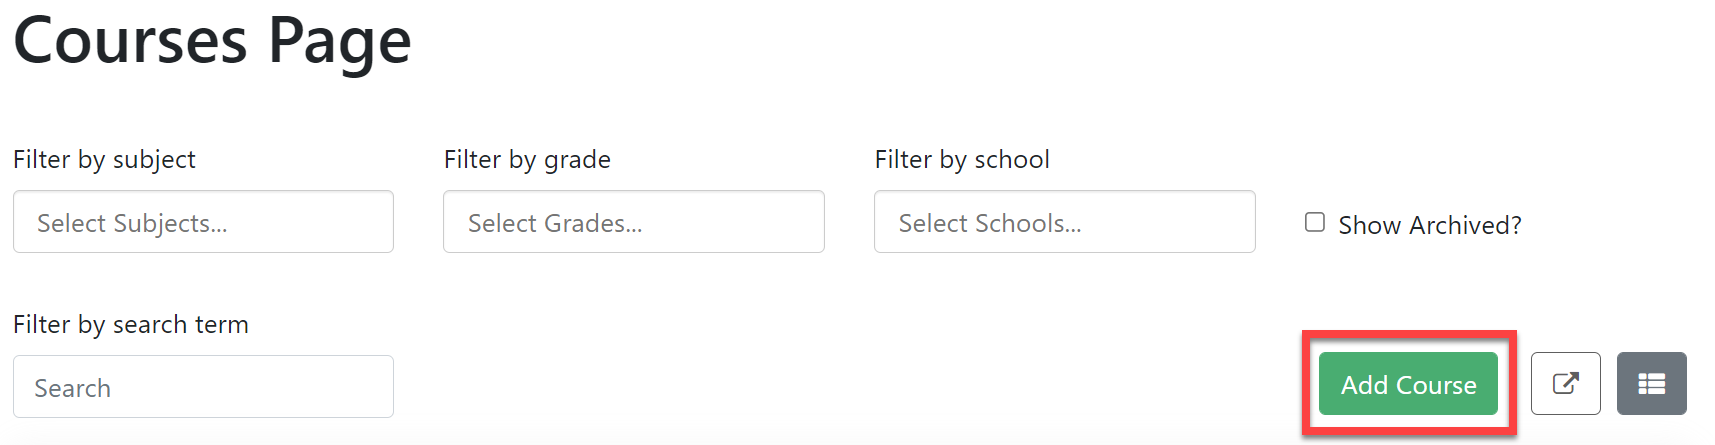
Select the Add Course button on the right.
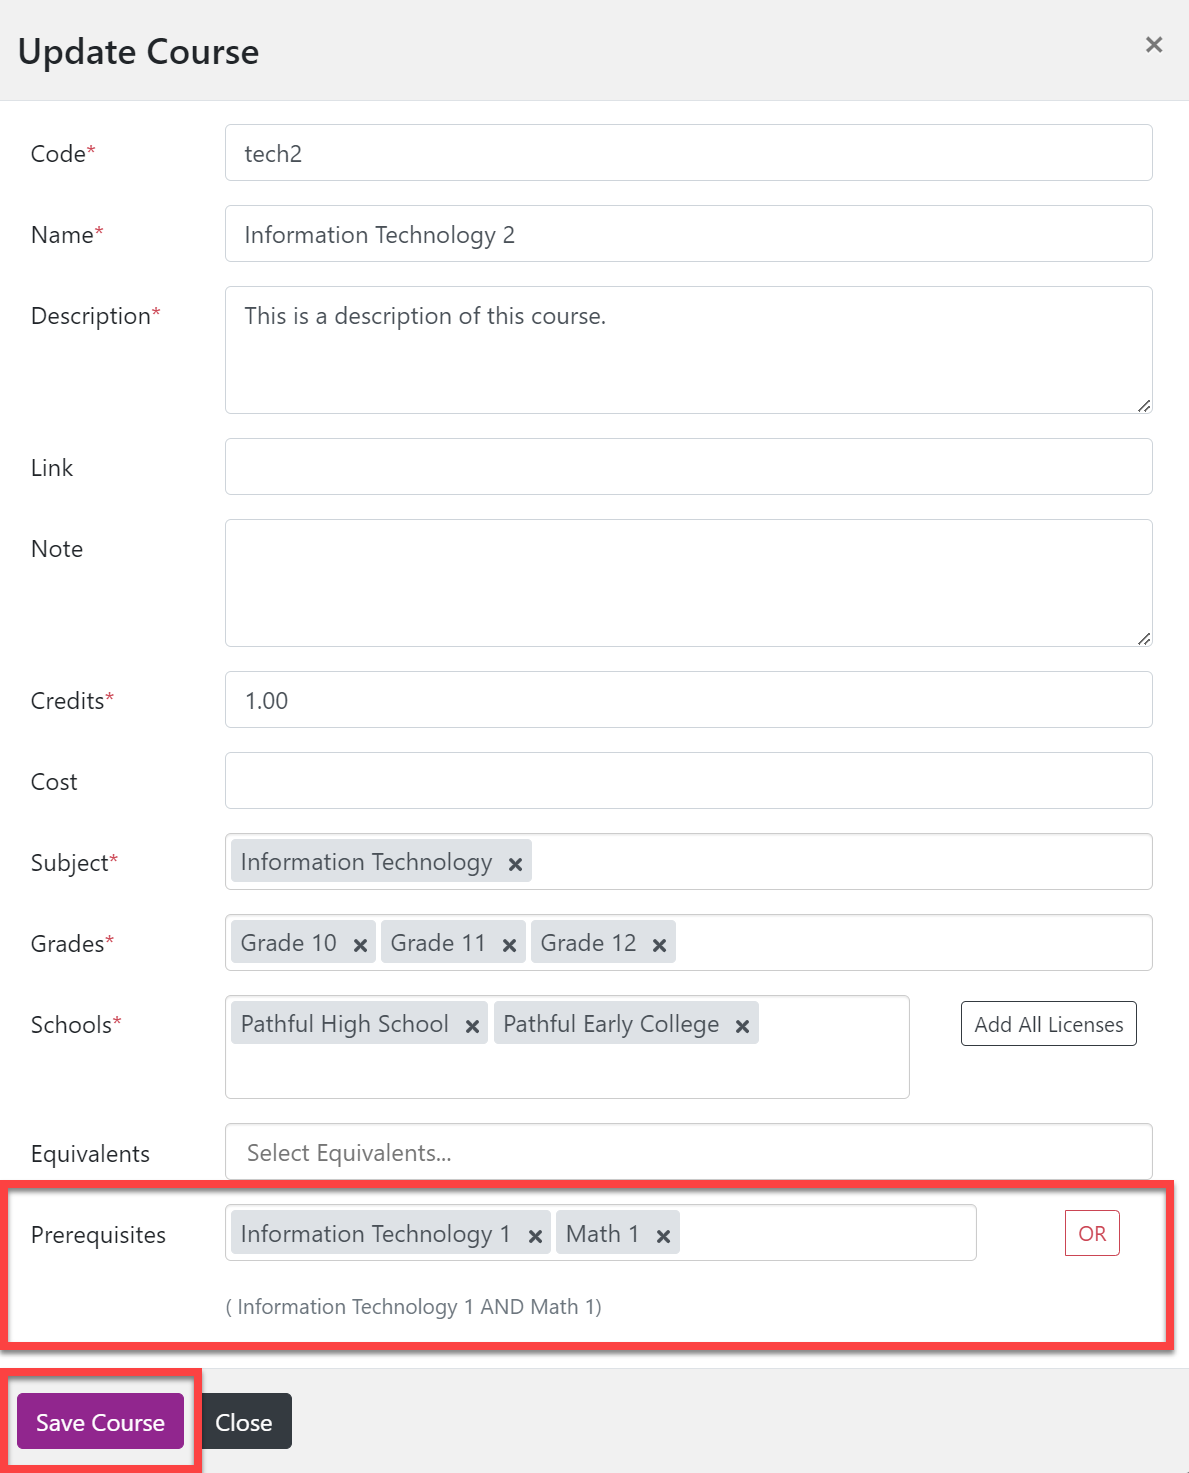
Complete the required fields or all fields as needed.(* indicates a required field).
*Code: The code used by the school or district for this course.
*Name: The name of the Course.
*Description: The description of the Course as you want it to appear in the Course Catalog.
Link: This can be a link to any additional information about this Course (i.e., the educational department, a syllabus, a video overview, etc.).
Note: Any additional notes the student may need (i.e., this course requires some night or weekend activities).
*Credits: The number of credits the student earns for completing this Course.
NOTE: Courses can have a credit of less than 1.For example, Math A and Math B might each be 0.5 credits and are taken over two consecutive semesters for a total of 1 Math credit).
Cost: The amount of cost associated with this Course, if there is one.
*Subject: The Subject(s) under which this Course is listed. More than one subject can be selected.For example, Art History may count as either a History course or an Art course.
*Grades: The grade levels to which this Course is offered.
*Schools: Choose the school (i.e., license) where this course is offered. There is an Add All Licenses button on the right.
Equivalents: List any Courses that are the same as this one. For example, Math 1 and Math 1 Honors may be equivalent Courses.
Prerequisites: Select prerequisites.
The prerequisite course(s) must exist as a Course before you can select it.
Courses listed in the same box are joined by "and" and courses listed in multiple boxes are joined by "or."Select the "OR" button to join courses with "or."Example: Information Technology 2 may require that students complete Information Technology 1 AND Math 1 or Infomation Technology 1 OR Math 1.
Select Save Course.