Google - How to Setup a Google Custom SAML Application
These are the steps for setting up your Google custom SAML application.
Last updated 3 months ago
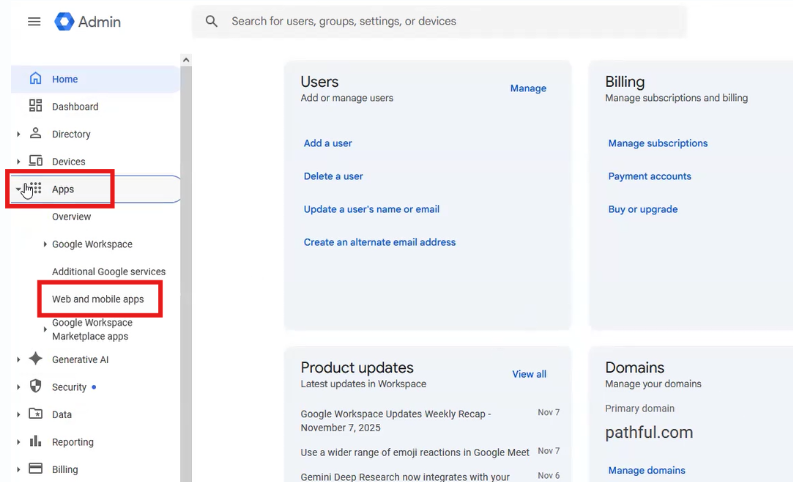
Step 1: Login to your G-Suite admin console. On the side menu click Apps > Web and mobile apps.
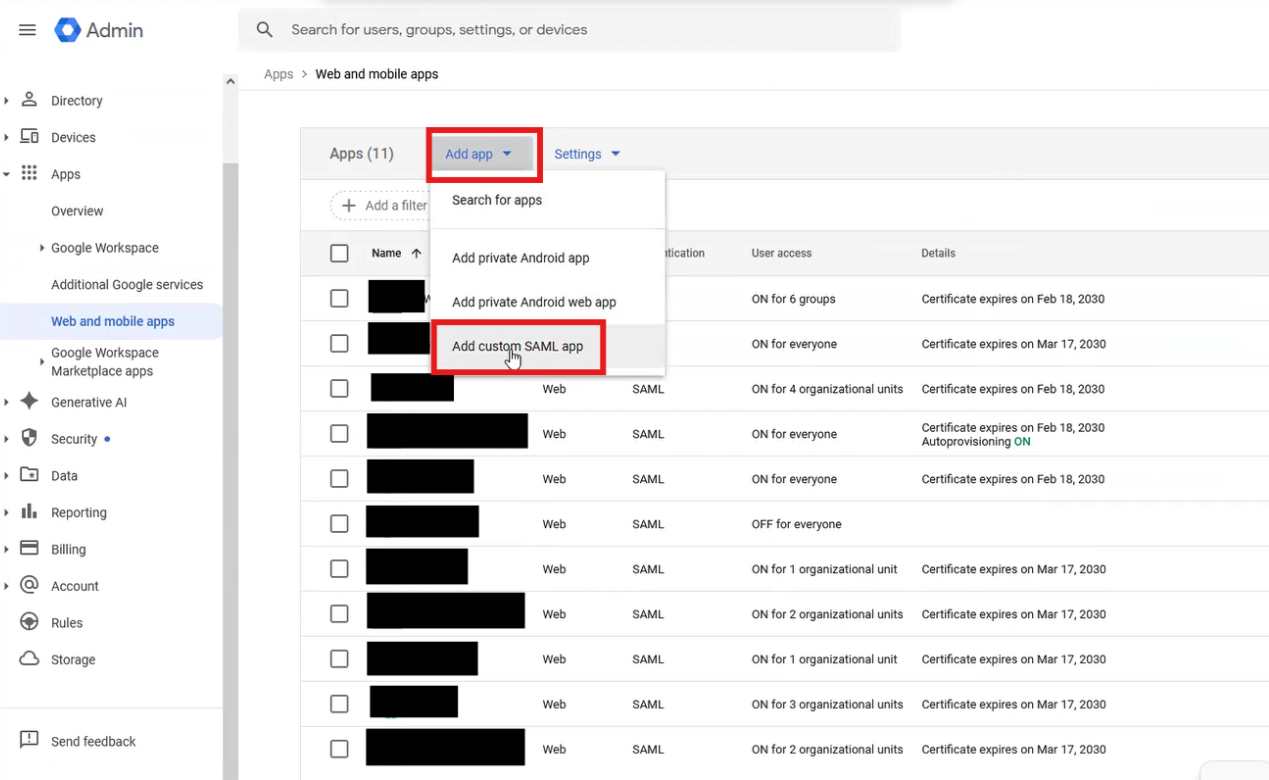
Step 2: From there, click Add App > Add Custom SAML app.
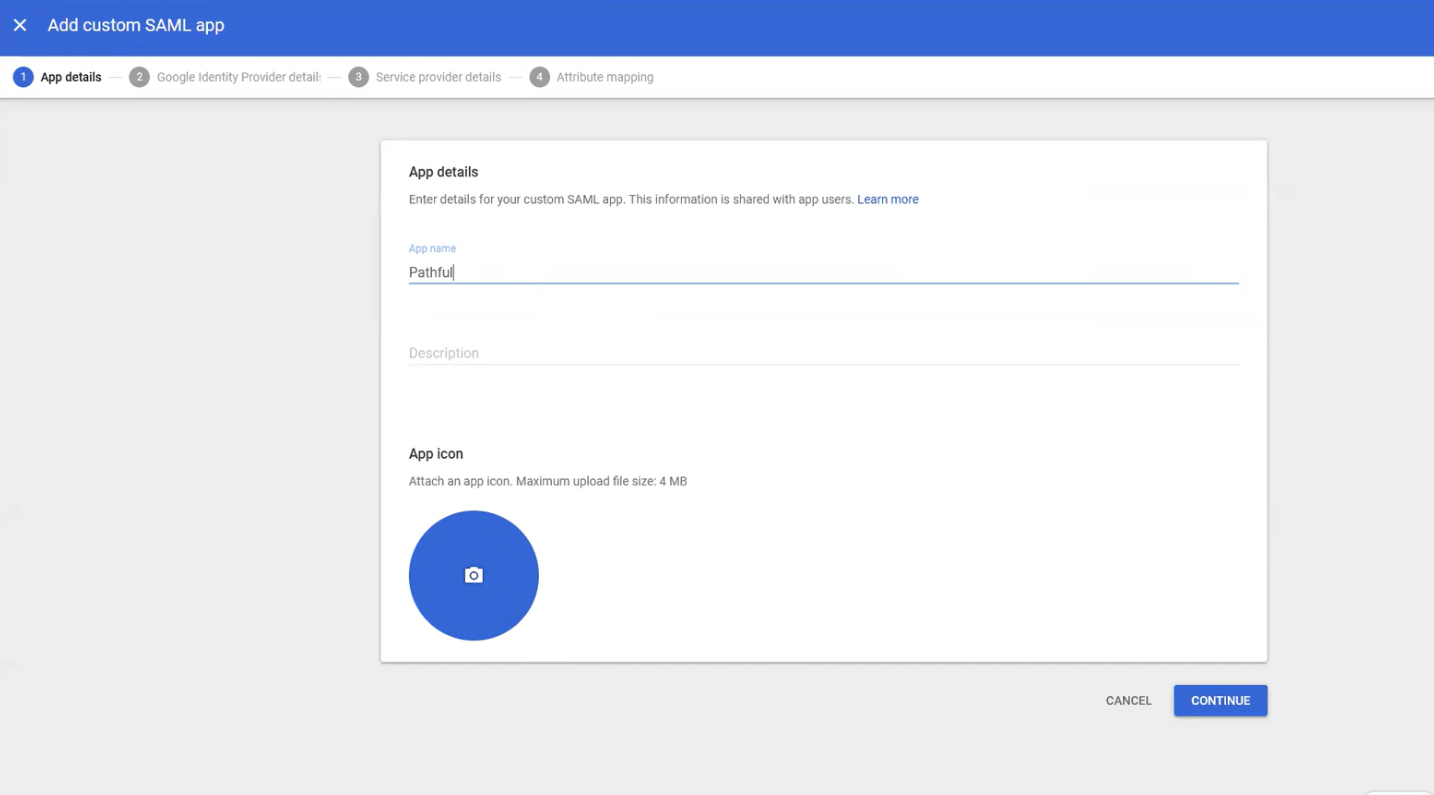
Step 3: Enter the App name (Pathful or Pathful Junior), Upload a logo (provided by us), then click Continue.
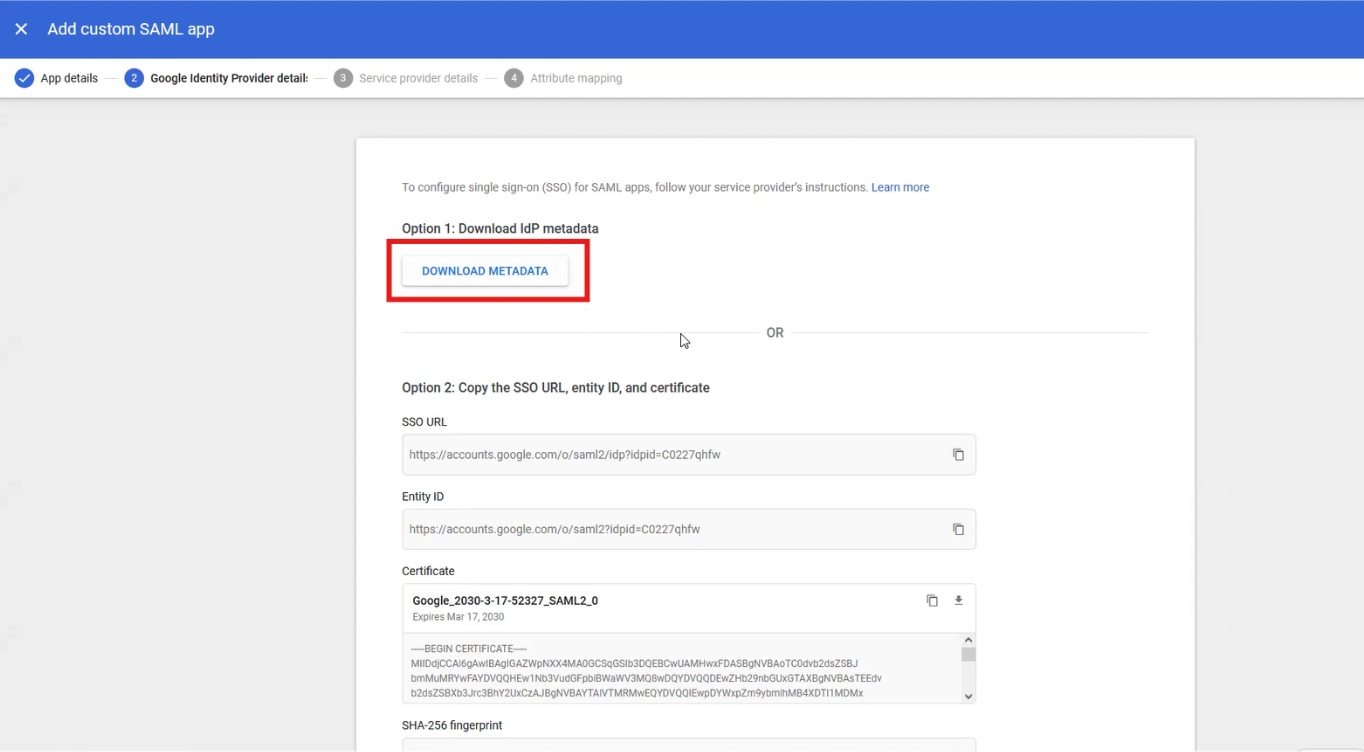
Step 4: If you haven’t already, download the IdP Metadata in .xml format and send the file to us. Once we update this on our end, this will allow your users to authenticate successfully. Once downloaded, click continue at the bottom of the screen.
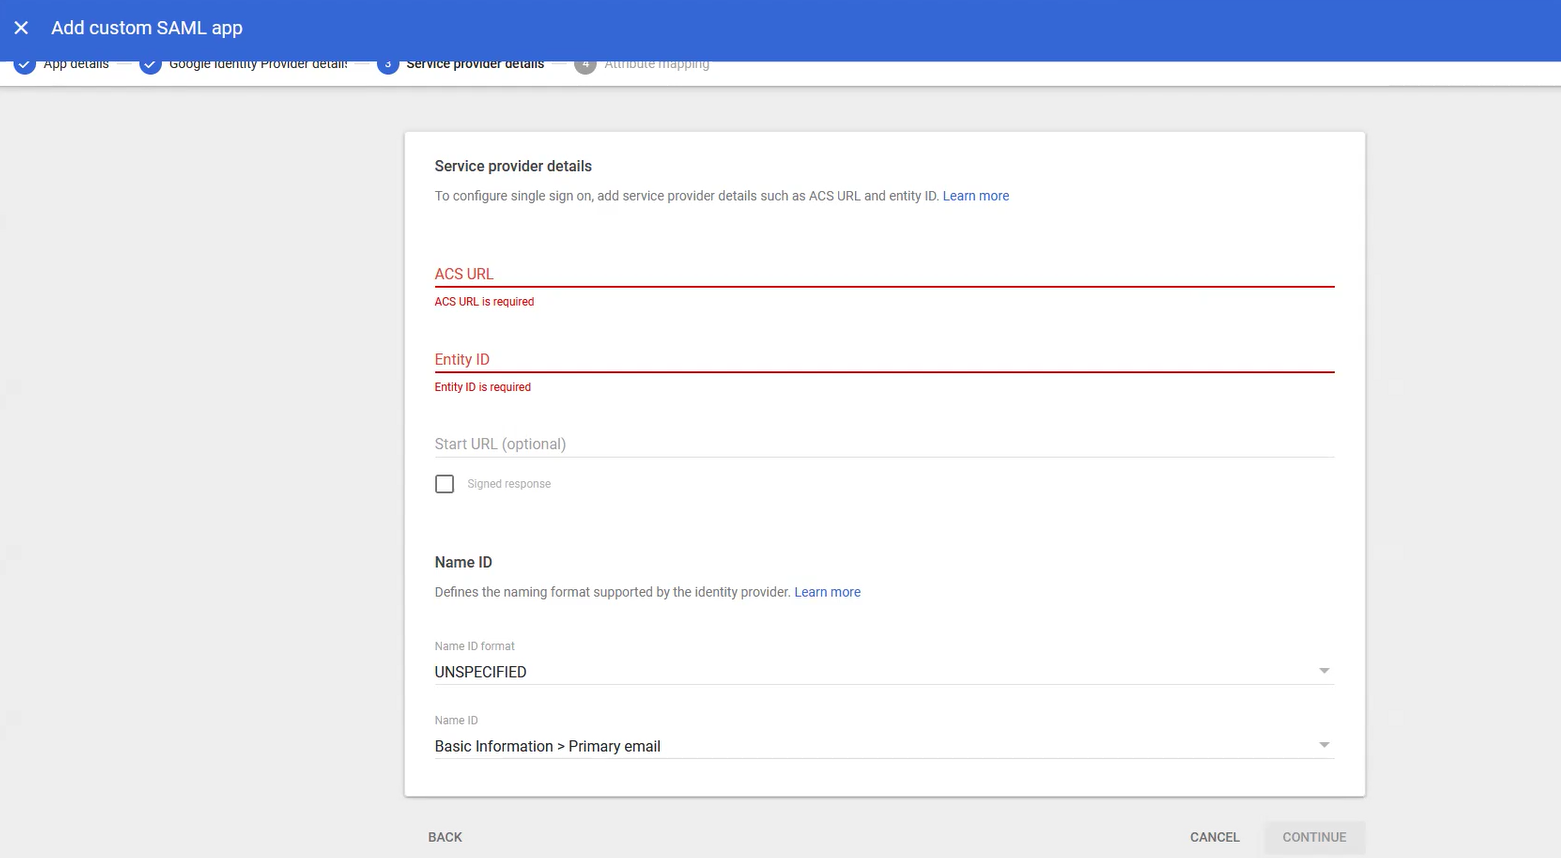
Step 5: Enter the credentials provided by the Pathful representative. These will be unique to your school or district.
ACS URL: provided by rep.
Entity ID: provided by rep.
Start URL: provided by rep.
Signed Response: checked
Name ID Format: UNSPECIFIED
Name ID: Basic Information > Primary Email
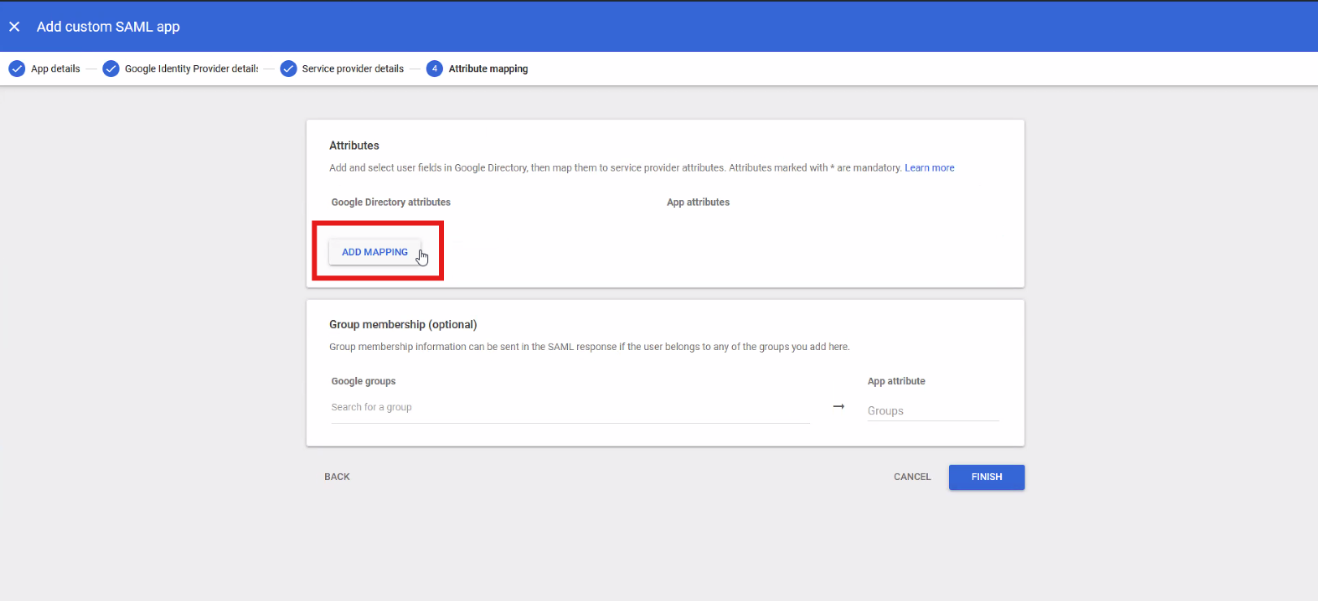
Step 6: Click Add Mapping button in order to add user information.
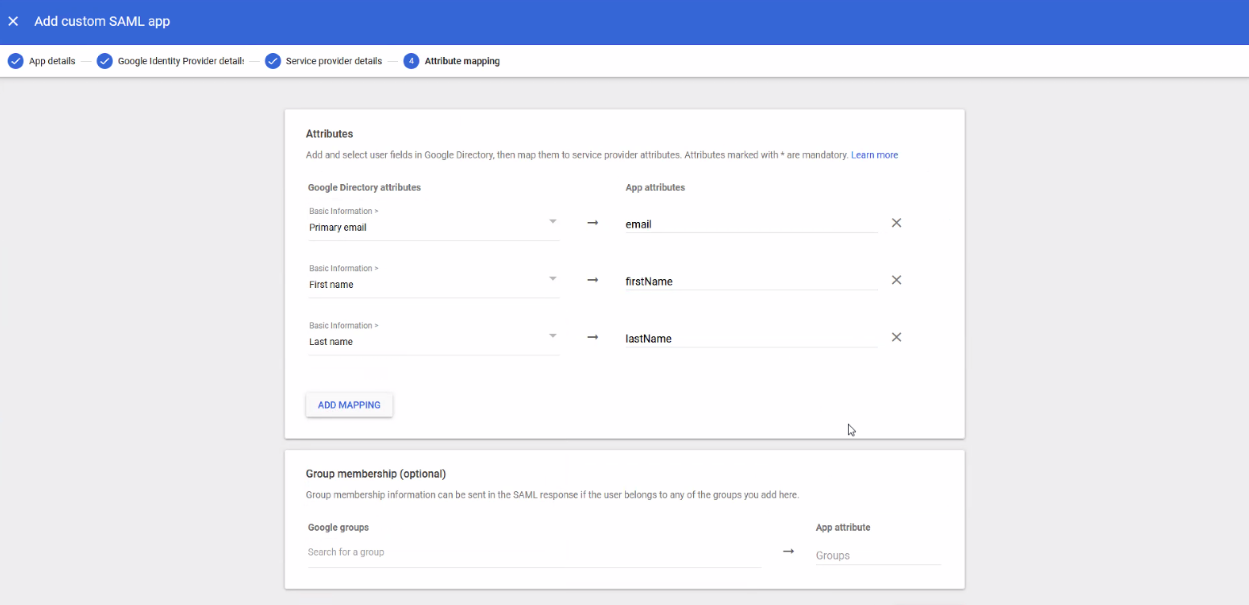
Step 7 Add the following mappings:
Basic Information > Primary Email >>mapped to>> email
Basic Information > First Name >>mapped to>> firstName
Basic Information > Last Name >>mapped to>> lastName
Once the mappings are added, click Finish.
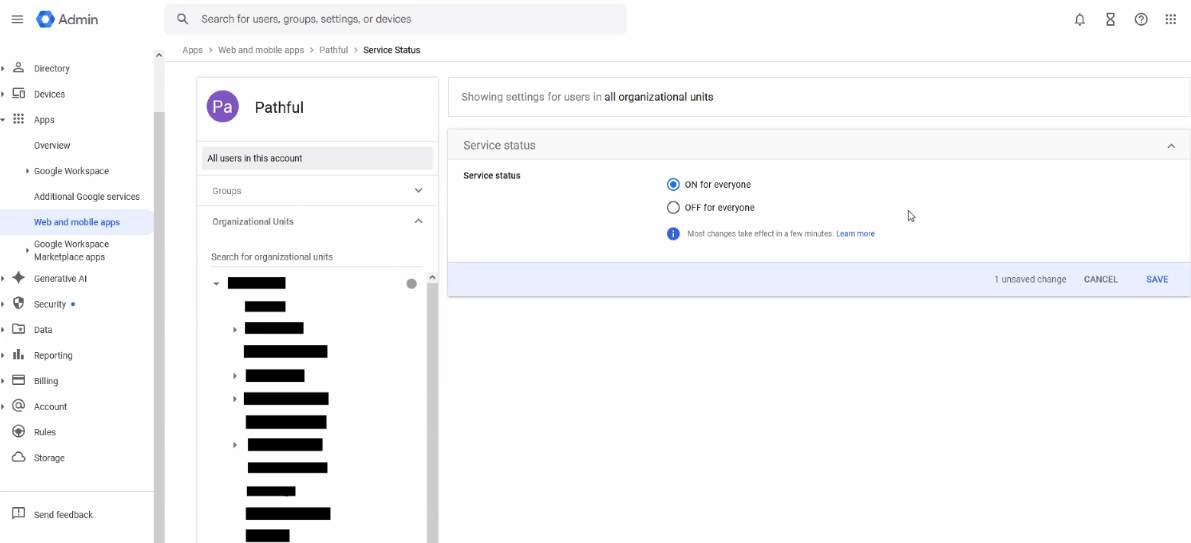
Step 8: The application is done, now you just need to assign the application to users. You will do this through sharing the application with everyone or just specific org units.
- Click on User Access from the SAML application screen.
- Change settings to share with everyone or share with particular org units on the left.
Step 9: You're all done! You may have to wait up to 24 hours before the application propagates through the Google G-Suite system.